P02 - Review, Edit, and Submit a Draft Material Requisition
Purpose: To process a Material Requisitions into a Purchase Requisition(s)
When: A Draft Material Requisition is in your queue
Who: FM Procurement Team Member
Resources to Complete Tasks A computer. A Maximo account, with FM Procurement access
STEPS NEEDED:
Log into Maximo with your Cornell NetID and password.
- Go to https://fcs.cornell.edu/maximo
- Under Quick Links menu on right side
- Click “Maximo Production”
- Enter login information & click "Sign In"
Open & review the Draft Requisitions queue
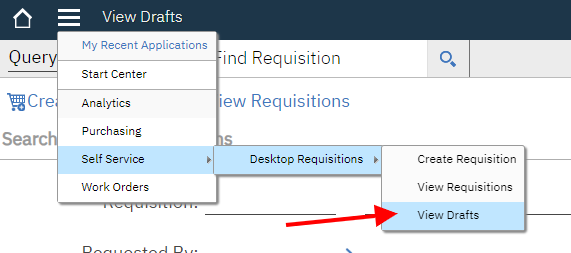
- From your Start Center, click the “View Drafts” link on the top left
- OR Click Go To – Self Service – Desktop Requisitions – View Drafts
In the “Ship To” field, type in your value (P01, P02, P03, P04, or CHP), then click the Enter key
- From your Start Center, click the “View Drafts” link on the top left
Review and Edit a Draft Material Requisition
- Click on a Requisition number to open a requisition
Click the “Create Requisition” button at the bottom right

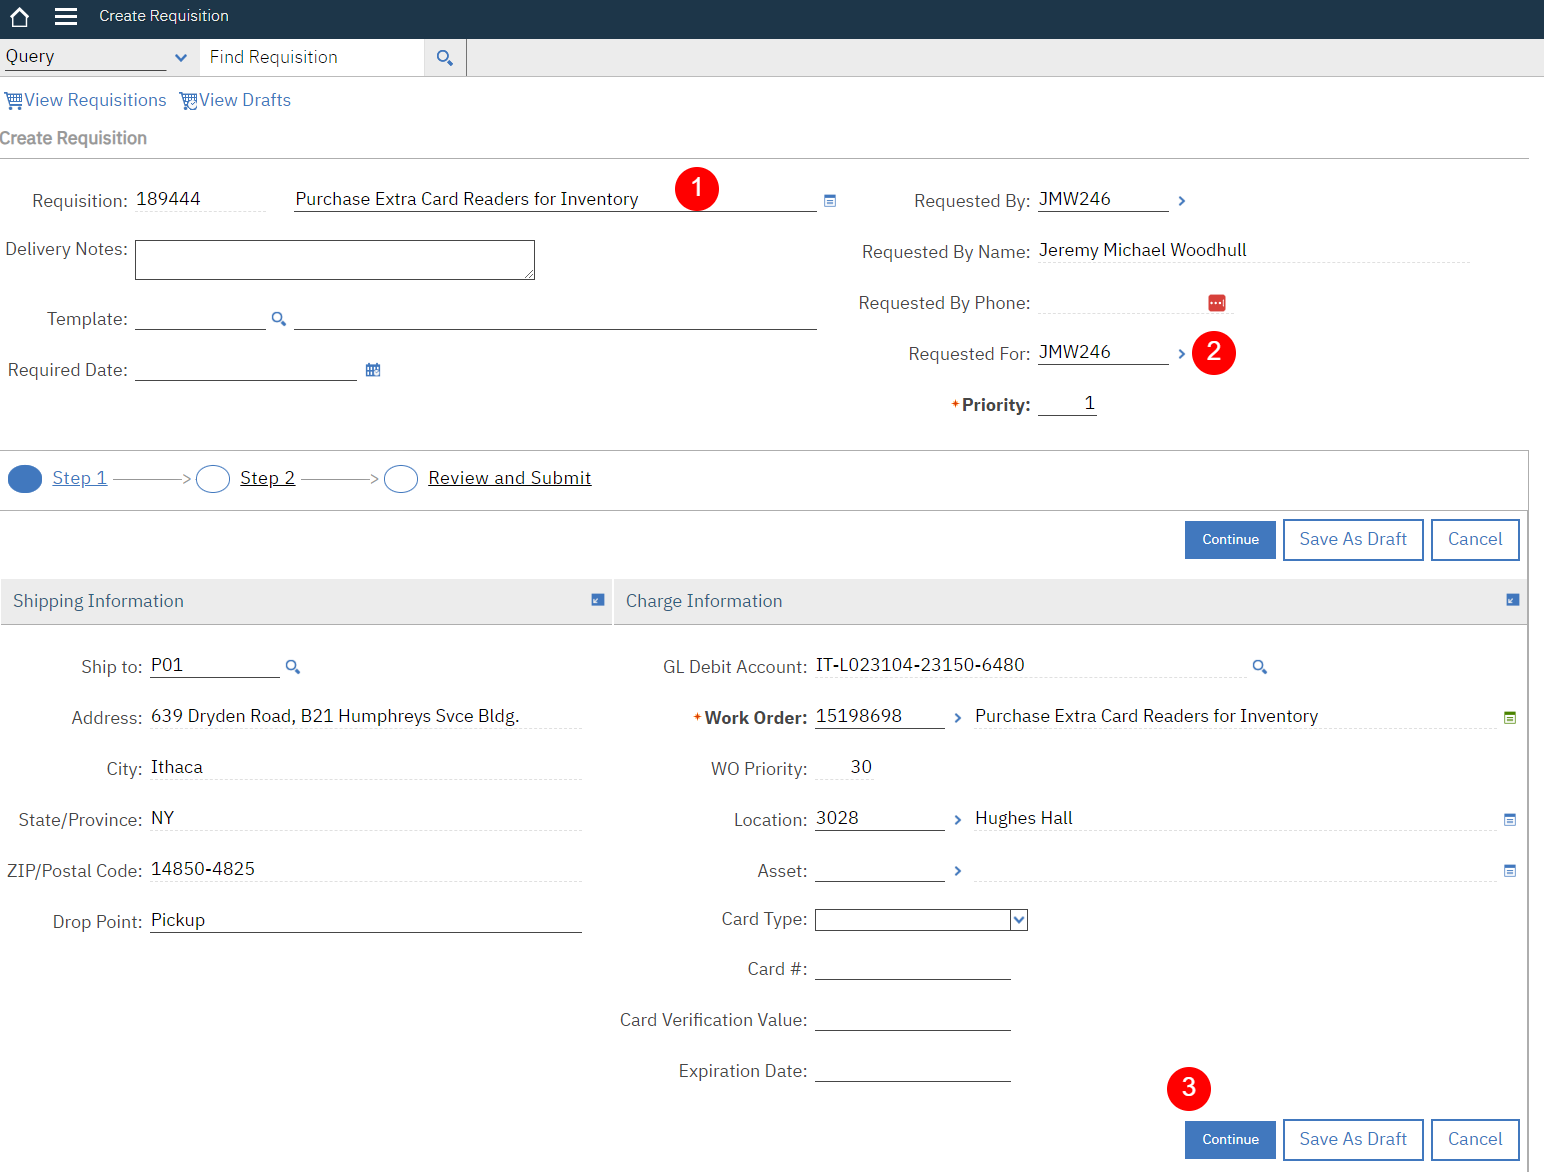
- Review/edit the information on this screen (Step 1)
- (Optional) Edit the Requisition Description if necessary (this will most likely be the work order description) (1)
- Change the “Requested For” (top right) to your NetID (Buyer’s) (2)
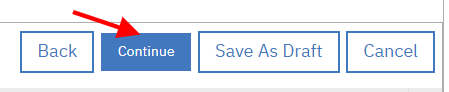
Click the “Continue” button at the bottom (3)
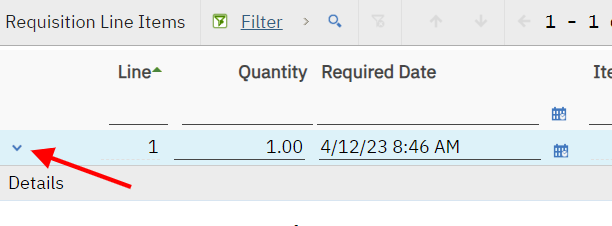
Review each line item (also, look for photo attachments)
Expand each line by clicking on the blue triangle to the left of each line (orange means the line is expanded, to view details)
- On each line, check to see if there is an attached photo
- The attachments paperclip will be highlighted in orange if there is an attachment
If orange, click on the paperclip and click “View Attachments”, and then open the photo

For lines with a Line Type “Item”, review the item, and add the vendor number Items will display an Item # in the “Item” column on each line.
- Review the Item # and description ‐ if you think the wrong one may have been selected, you can change the item number by clicking on the gray arrows to the right of the item number, and then clicking “Select Value”
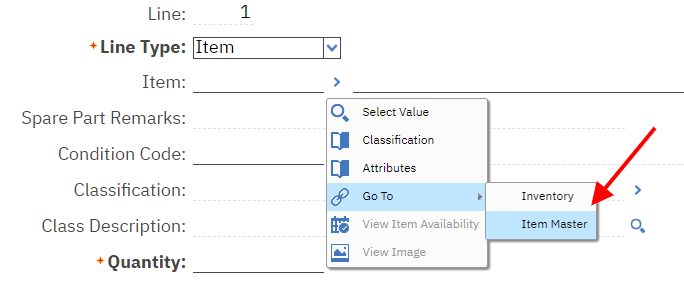
- Lookup the vendor from Item Master (which will show vendors the item has been ordered from in the past). If you already know the vendor, skip to step c or d.
Click the gray arrows to the right of the “Item” field, then hover over “Go To, then click Item Master”
- Click the “Vendors” tab
- If necessary, expand each line by clicking on the to view more information, such as the vendor name
- Highlight the vendor number and copy it (click Ctrl‐C or right‐click with the mouse and select “Copy”)
- Click the “Return” link at the top right of the screen
- In the “Vendor” field, paste the vendor number (click Ctrl‐V or right‐click with the mouse and select “Paste”)
- Click the Tab key ‐ the vendor name will automatically populate
- If you know the vendor and just need to search for it:
- Click the gray arrows to the right of the “Vendor” field, and click “Select Value”
- Search for the vendor number or description using the blank fields above the columns
- Click on the Vendor number (if there are more than one number for a specific vendor, choose the number with the dash at the end – for example, use 2326230‐01 instead of 2326230)
- You will be brought back to the Requisition screen, and the vendor number and vendor name will be populated
- If you know the vendor number, type it in the “Vendor” field and click the tab key. The vendor name will automatically populate
For a line with a Line Type “Material”, review description, and add the vendor number
- Review the Material Description. Is it listed as an Item # in Maximo?
- If yes, go to Task 7
- If no, proceed with Step b.
- If necessary, revise the material description
- Populate a vendor ‐ follow steps 5c or 5d above
- Review the Material Description. Is it listed as an Item # in Maximo?
For a line with a Line Type “Material”, but what is being requested is listed as an “Item” in Maximo, do these steps:
- Click the “New Row” button at the bottom right
- Click the gray arrows to the right of the “Item” field, then click “Select Value”
- In the “Description” field, type in any part of the item name, then click the “Enter” button
- Look through the list until you find the item
- Click on the Item – the Item number will populate on the Requisition screen, along with the Item description. If a Catalog # is related to the Item #, that field will also populate.
- In the “Quantity” field, type in the same quantity that is shown on the requested Material Line, then click the Tab key
- Go to the original Material Line, copy the Description, and paste it in the “Long Description” field of the new “Item” line, then click “OK”. (The icon for the Long Description field is to the right of the Item Description field.)
- Populate a vendor ‐ follow steps 5b, 5c, or 5d above
- Click on the original Material line, and click the “Delete Row” button on the far right
- Click the “New Row” button at the bottom right
Submit the Desktop Requisition
Once all lines have been reviewed and have vendor information added, click the “Continue” button at the bottom right
- Review the screen once again, then click the “Submit” button at the bottom right
- Important: once a Desktop Requisition has been submitted, the status will change to APPR, and it can no longer be edited.
A box will pop up with a notification that the Desktop Requisition has been submitted.

- To continue, click the “View Details” button. (Otherwise, click the “Return to Start Center” button.)
- If you chose “View Details”:
- The Requisition will show a Status of “APPR” at the top of the screen
- Note: the Requisition can no longer be edited at this point.
Review and make decisions on the PRs created
Click the “History” tab
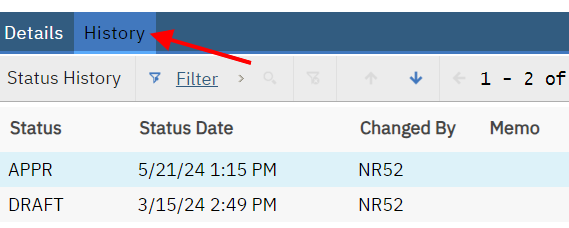
- In the “Purchase Requisition Status History” section, a list of approved PRs (specific to each vendor) will be listed. These were created automatically from the approved Desktop Requisition.
- Note: If any Vendor fields were left blank on the Desktop Requisition Line Items, those requisition lines will be combined into one PR
- Determine how to proceed:
- To request a quote OR to request a vendor to fill a cart in eShop, go to SOP P3 and start with Task 2a OR
- To create a Maximo PO from the PR and place an eShop, PCard, or I Want Doc order, go to SOP P4, and start with Task 2a
The Result Will Be: A DRAFT Material Requisition will have been reviewed, and verified that all lines have appropriate Line Types and the vendors populated for each line. The Material Requisition will have been submitted and changed to a status of APPR. PRs for each vendor will have been created.