P01a - Create a Desktop Requisition in Maximo for Tools - FM Procurement
Purpose: To create a Material Requisition for Tools
When: Tool(s) are needed to be ordered
Who: FM Zone Admin, FM Operations Admin, Zone Facility Manager or Operations Manager
Resources to Complete Tasks A computer. A Maximo account, with access to submit Desktop Requisitions
Important: Please follow the process below for all tool orders, unless the tool is being purchased on a PCard by the Zone due to URGENT Need Only. In that case, please take note of these two important steps:
- When submitting the PCard information into ImageNow, GL account R643850 must be used.
- Create a Maximo Material Requisition as below, with the following modifications:
- In Step 3b, DO NOT enter a Maximo WO # (this will cause a duplicate charge on the Maximo WO).
- In Step 4c, type the Material Line description as "Tool ‐ See attachment".
- In Step 5, attach the PCard receipt.
STEPS NEEDED:
Verify for approved order
- Verify the order was approved by the requestor’s supervisor
Log into Maximo with your Cornell NetID and password.
- Go to https://fcs.cornell.edu/maximo
- Under Quick Links menu on right side
- Click “Maximo Production”
- Enter login information & click "Sign In"
Create a Material Requisition (Desktop Requisition)
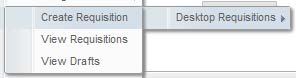
Click on the hamburger menu then Self Service – Desktop Requisitions – Create Requisition
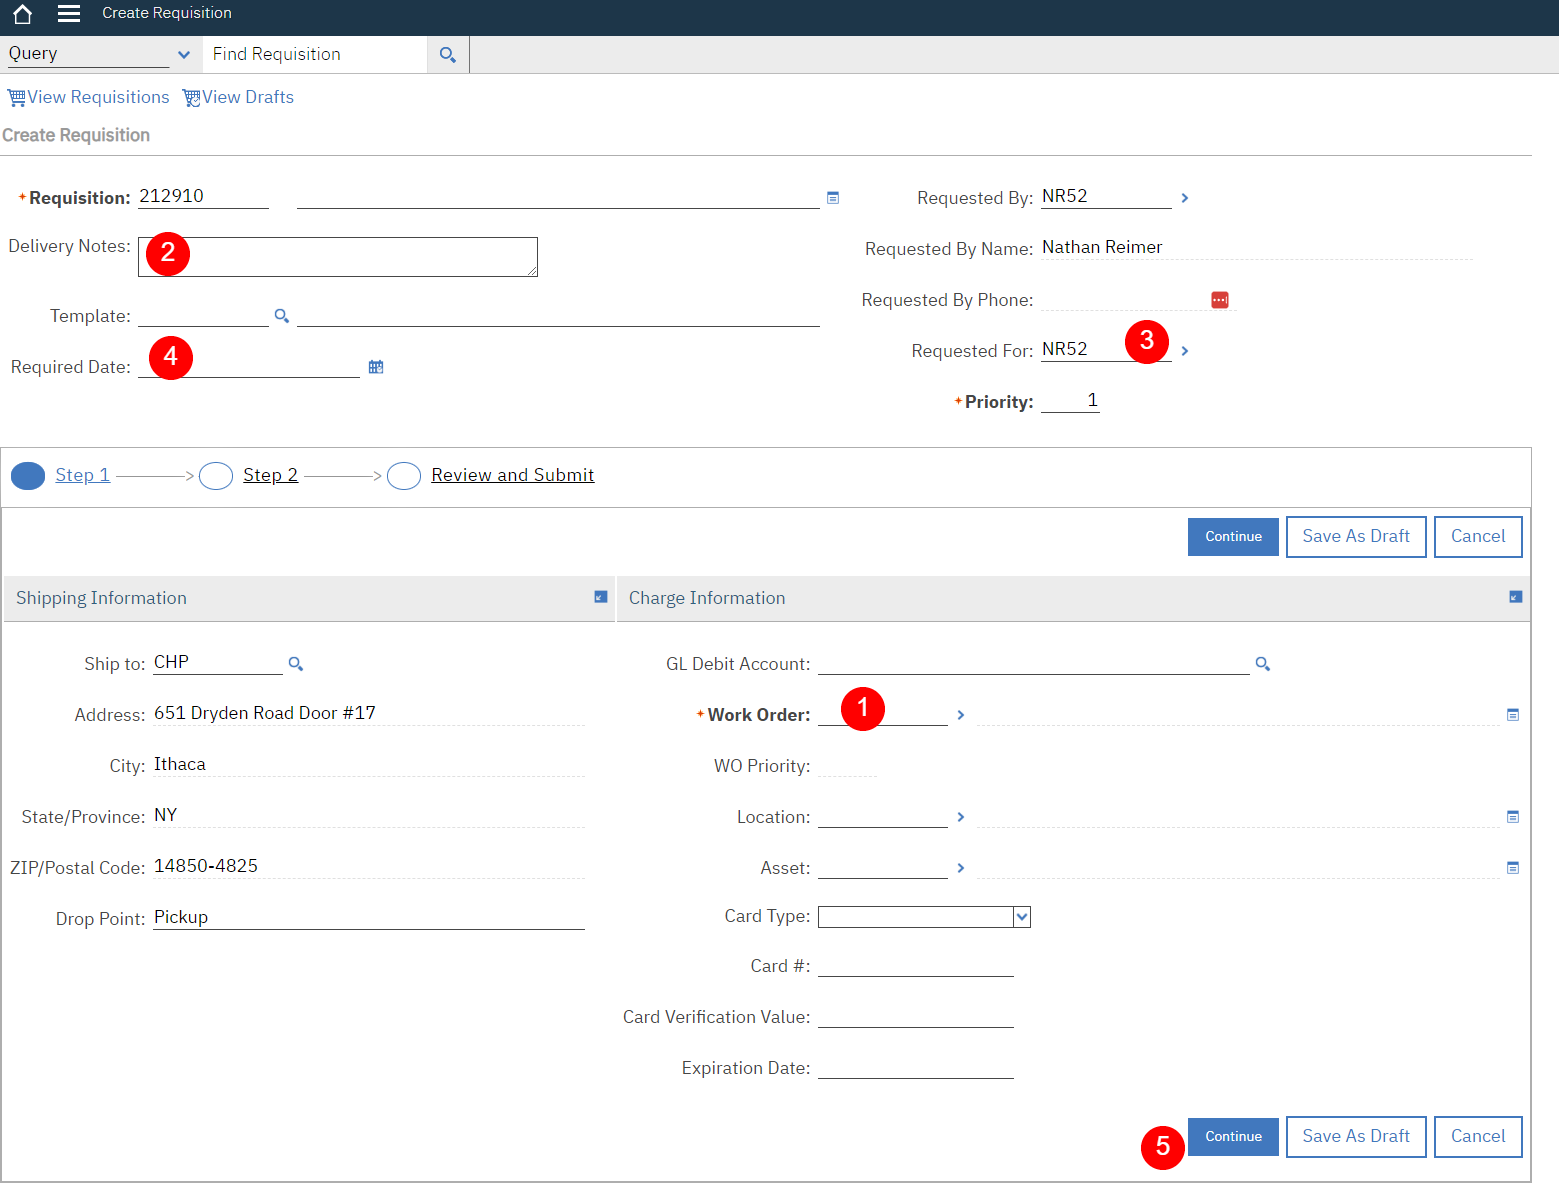
- In the “Work Order” field (middle right), field (middle right), type the appropriate WO#, then click the tab key: (1)
- CC Zone – 9118873
- FM Operations (CZ) – 15507582
- EN Zone – 9118875
- SA/SCL Zone – 9118876
- Important: Do not distribute these WO’s. They may not be used for labor or materials.
- In the "Delivery Notes" field, type “Deliver To: [name of person (Admin/ZFM) placing the requisition]”.
For example, “Deliver to Jane Doe” (2) - Change the “Requested By” (top right) Net ID to the person you are submitting the tool requisition for. (3)
- If the tool order is general/for the whole zone, leave your NetID in the “Requested By” field, then choose “P05” in the “Ship To” field.
- Optional: If materials are for a high priority work order, fill in a date in the “Required Date” field (top left). (4)
Click the “Continue” button on the bottom right (5)
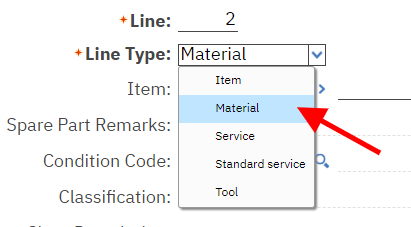
If the order is for a “Material” that is not listed in the Maximo item list, do the following: (If not applicable, go to Task 5)
- On the bottom left of the “Requisition Line Items” section, click the “New Row” button
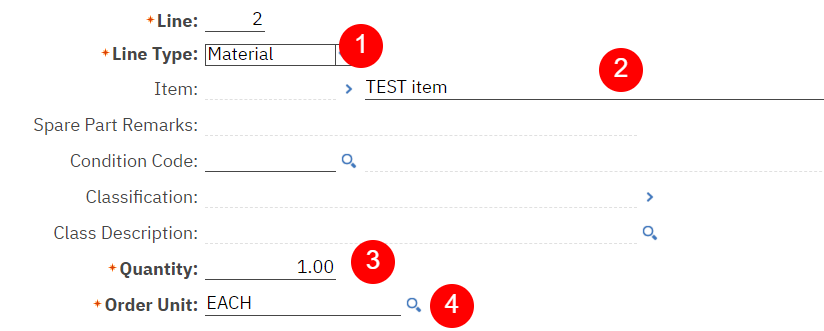
Change the Line Type to “Material” (1)
- Type a Material Description in the field directly to the right of the “Item” field (2)
- In the “Quantity” field, type a quantity (3)
- In the “Order Unit” field, type or select a unit using the magnifying glass (the majority of the time, it will be “EACH”) (4)
Repeat Task 4, steps a‐e for any other tools needed
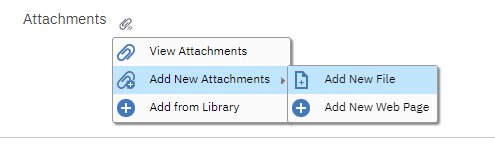
To attach a quote or a picture to a line item, do the following: Note: You may also want to type “See attached” along with the description.
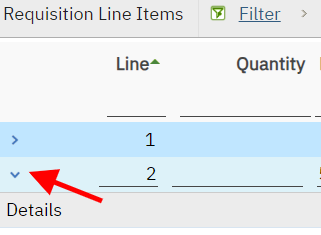
- Expand the line you want to add the attachment to by clicking on the blue triangle to the left of the line
- Click the “Attachments” icon in the middle of the screen
- Click “Add new Attachments”, then “Add New File”
- Click “Choose File”, select the file on your computer, then click “OK”.
The paperclip icon will be highlighted in orange
When all lines have been created, review and Save the “Draft” Requisition
Use the triangles to the left of each line to expand/contract each line if necessary, for your review.
- When all lines have been populated correctly, click the “Continue” button
- Important: On the next screen, click the “Save As Draft” button at the bottom (Do NOT click “Submit”)
The “Submit” button must only be clicked by a FM Procurement Team member, and only when a vendor has been populated for each requisition line item. This is because the Submit button creates a PR for each vendor and will close the requisition. See SOP P2 for populating vendors and submitting the requisition.

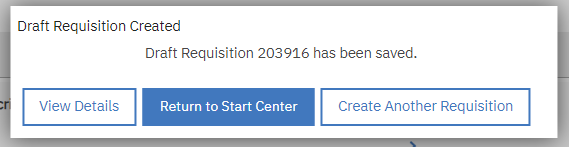
- After clicking “Save as Draft”, a box will pop up with the Draft Requisition ID #.
- FM PROCUREMENT GROUP ONLY: To continue with this Requisition, click the “View Details” button and follow SOP P2, and start with Task 3.
- Or, click “Return to Start Center”
OR, if you need to create another requisition, click “Create Another Requisition” and follow this SOP starting with Task 2b.
The Result Will Be: A Tool Requisition in DRAFT status will be in the FM Procurement’s queue to process.