P04 - Create a Maximo Purchase Order from a PR and Place Order with Vendor
Purpose: To place a material order for a work order
When: Open Purchase Requisitions exist in Maximo
Who: FM Procurement Team Member
Resources to Complete Tasks A computer. A Maximo account, with FM Procurement access
STEPS NEEDED:
Log into Maximo with your Cornell NetID and password.
- Go to https://fcs.cornell.edu/maximo
- Under Quick Links menu on right side
- Click “Maximo Production”
- Enter login information & click "Sign In"
Open a Purchase Requisition
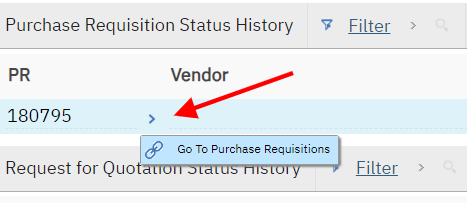
- Either jump to it from the Desktop Requisition screen (History tab), if continuing from SOP P2
- Click the gray arrows to the right of the PR number and click “Go To Purchase Requisitions”
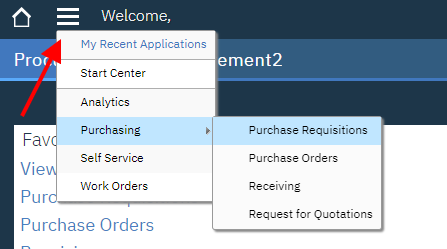
OR…at the top right of the Maximo screen, click "Go To – Purchasing – Purchase Requisitions"
If necessary, select your query of open PRs using the top left drop down (it may already be set as your default)
- Find the PR in the list, and click on a PR number to open it
- Either jump to it from the Desktop Requisition screen (History tab), if continuing from SOP P2
Review and update pricing on the Maximo PR, if necessary. If not applicable, skip to Task 4
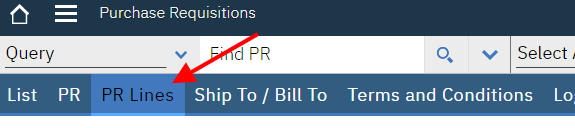
Click the “PR Lines” tab
- Important: For PCard orders only: if the vendor quote has different pricing than the Maximo PR, and/or if it is a PCard or I Want Doc order, and there is a shipping & handling charge or PCard fee, update costs on the PR lines by doing the following. (If this information is unknown at the time, you will also have the opportunity to update it on the Maximo PO.)

Click the “Change Status” button. Change the status to “Waiting On Approval”, then click “OK”
- To update unit costs, edit the amount in the “Unit Cost” field on each line. Click the tab key, and the Line Cost will update.
- Important: If you will be adding additional PR lines ‐ for example, for Shipping and Handling, or a PCard Fee, do the following first:
Expand the first PO line and copy the WO # from the Work Order field and paste it into the “Work Order” field under the Default Table Data section. This will make is so all new PR Lines added to the PO will have this WO #.

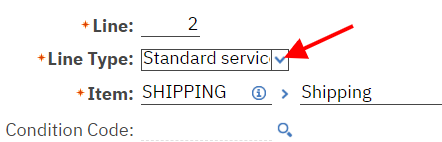
- To add a line for shipping & handling:
- Click “New Row” button on the bottom right
- Choose the Line Type “Standard Service”
- In the “Item” field, type the letters “sh”, then click the Tab key. The description “Shipping” will automatically populate.
- Type the amount in the “Line Cost” field
- To add a line for a PCard fee:
- Click “New Row”
- Choose the Line Type “Standard Service”
- In the “Item” field, type the letters “pc”, then click the Tab key. The description “PCard_Fee” will automatically populate.
- Type the amount in the “Line Cost” field

Click the “Approve” button.
- Type a Memo (optional), then click “OK”
Create a Maximo PO (MPO)
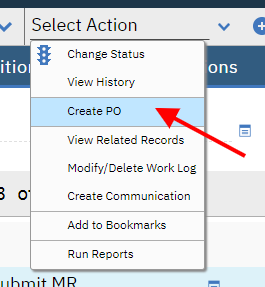
- Click "Select Action – Create PO"
- Note: the PR must be in APPR status to create a PO
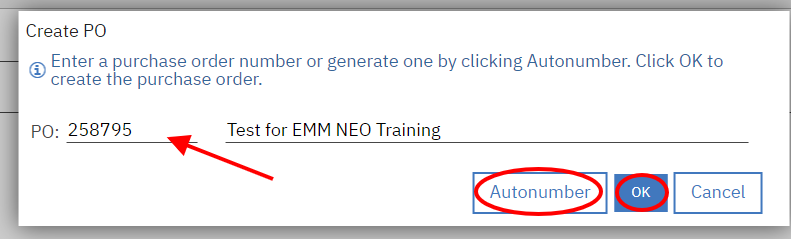
Click the “Autonumber” button, then click “OK”
- Click "Select Action – Create PO"
“Jump” to the Purchase Order from a PR line
- If not already, click a blue triangle to expand any of the PR lines
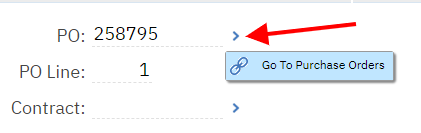
- The MPO number will be displayed in the middle/bottom of the screen in the “Related Records” section
- Click on the gray arrows to the right of the MPO number, then click "Go To Purchase Orders"
The MPO will open in the Purchase Orders application
Populate fields on the “PO” Tab
- Important: In the “Type” field, type or use the magnifying glass icon to select the order type
- ESHOP = eShop order
- PCARD = PCard order
UBSC = I Want Doc order
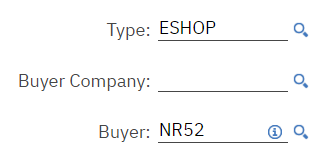
- In the “Buyer” field, type your NetID
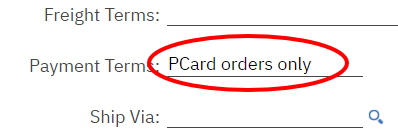
- For PCard orders only: update the “Payment Terms” field to be the card name and the last 4 digits of the card number (for example, “VISA 1234”)
(Optional) Edit the MPO Description field to the right of the MPO # at the top of the screen
- Important: In the “Type” field, type or use the magnifying glass icon to select the order type
Review the “Ship To / Bill To” tab
Click the "Ship To / Bill To" tab and review the information

- In the “Ship To” section, if necessary, click the magnifying glass to change “Ship To” or “Attention”
- The “Attention” should be the requestor of the materials from the Material Requisition.
- Ignore the “Bill To” section – this information does not affect the ordering process.
Review the “PO Lines” tab
Click the “PO Lines” tab

If necessary, expand each line by using the blue triangle to the left of each line

- Verify all PO lines reflect what the vendor will be fulfilling
To remove a line, click the Trash Can icon to the right of the row, then click the “Save” button

- If the deleted line was from a multiple line PR, the PR will go from CLOSED to APPR and the PR line is available to be ordered
- If the deleted line was from a one line PR, PR, will go to CANCELLED (To create a new PR, duplicate the cancelled PR)
To proceed with a PCard order: (If it is not a PCard order, skip to Task 10)
- When placing the order with the vendor, do the following:
- Always provide the Maximo PO # to the vendor
- If possible, obtain the shipping & handling charge
- Optional: Provide the Maximo WO # to the vendor
- Optional: Run the “CU Purchase Order Details” report and email it to the vendor
- Verify the MPO matches the vendor invoice. If applicable, add a line on the MPO for a Shipping & Handling fee OR a PCard fee (This step may have already been done, from the PR. If so, skip to step c.)
- Note: The MPO must be in WAPPR status in order to update costs. (If the MPO is already in a status of APPR, click Select Action – Revise PO. Type a reason in the comments field. Click “OK”, then complete the following steps.)
- To update unit costs, edit the amount in the Unit Cost field on each line. Click the tab key, and the Line Cost will update.
- Important: If you will be adding additional PO lines ‐ for example, for Shipping and Handling, or a PCard Fee, do the
following first:- Expand the first PR line and copy the WO # from the Work Order field and paste it into the “Work Order” field under the Default Table Data section. This will make is so all new PO Lines added to the PO will have this WO #.
- To add a line for Shipping & Handling:
- Click “New Row” button on the bottom right
- Choose the Line Type “Standard Service”
- In the “Item” field, type the letters “sh”, then click the Tab key. The description “Shipping” will automatically populate.
Type the amount in the “Line Cost” field
- To add a line for a PCard Fee:
- Click “New Row” button on the bottom right
- Choose the Line Type “Standard Service”
- In the “Item” field, type the letters “pc”, then click the Tab key. The description “PCard_Fee” will automatically populate.
- Type the amount in the “Line Cost” field
- Click the “Approve” button (the status will change to APPR)
- Enter a Memo if desired, then click “OK”
- Note: Items cannot be received unless the MPO is in APPR status
Click the “Return” link on the top right of the screen, which will bring you back to the Purchase Requisition. (If it asks if you want to save your changes before continuing, click “Yes”.)

- If you began this SOP with a Desktop Requisition, click the “Return” link again to return to the Desktop Requisition “History” tab.
- Follow this SOP (P04) for another approved PR, OR click “Start Center” to return to your Start Center
- When placing the order with the vendor, do the following:
To proceed with an eShop order: (If it is not an eShop order, skip to Task 11)
- Do NOT approve the MPO (leave the MPO in WAPPR status)
- Log into eShop and build / process the cart
- On the Shopping Cart screen, type the Maximo WO number in the “Cart Name” field. This will transfer forward to the Kuali Purchase Requisition screen
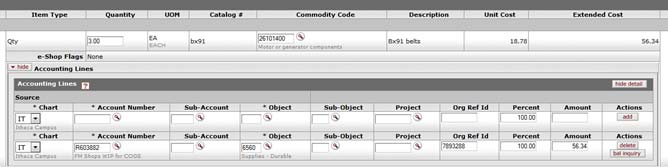
Important: On the Kuali Purchase Requisition screen, enter the MPO number in the “Organization Document Number” field
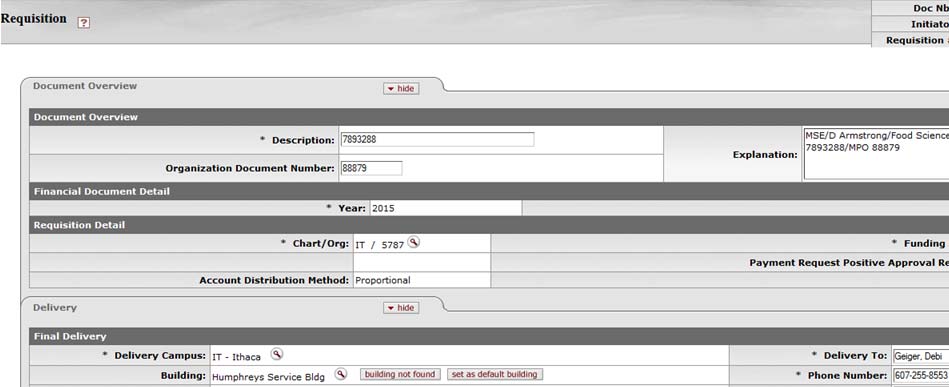
Important: In the GL Account String, enter the Maximo Work Order number in the “Org Ref ID” field (the WO number can be found on the MPO, “PO Lines” tab, on an expanded PO Line)
- Submit the KFS Requisition
- Within 15 minutes of the KFS PO showing up in the KFS database, the MPO will automatically update to APPR status, along with any PO line updates
- In Maximo, click the “Return” link on the top right of the screen, which will bring you back to the Purchase Requisition. (If it asks if you want to save your changes before continuing, click “Yes”.)
- If you began this SOP with a Desktop Requisition, click the “Return” link again to return to the Desktop Requisition “History” tab
- Follow this SOP (P04) for another approved PR, OR click “Start Center” to return to your Start Center
To proceed with an I Want Doc order:
- Do NOT approve the MPO (leave the MPO in WAPPR status)
- Important: All lines on the MPO must have a quantity and unit cost greater than zero. If you do not know what shipping costs will be, do not add a line to the PO.
- See Task 9b in this SOP for how to update costs.
- Click the “Save” button
Click the “IWNT” button on the top of the MPO screen

- Clicking this button will send data from the MPO and automatically create an “I Want Doc” in the Procurement Gateway. It will only submit if the PO Type is “UBSC”. (Note: The IWNT button only creates and saves the I Want Doc in the Procurement Gateway ‐ it does not submit it. See step f. below for how to proceed from there.)
- If successfully submitted, a message will pop‐up saying, “I Want Send successfully initiated.” Click “OK” to close the dialog box.
- Click the “Save” button again. The PO status will change to “ORDERED”.
- Click the “Return” link on the top right of the screen, which will bring you back to the Purchase Requisition. (If it asks if you want to save your changes before continuing, click “Yes”.)
- If you began this SOP with a Desktop Requisition, click the “Return” link again to return to the Desktop Requisition “History” tab
- Follow this SOP (P04) for another approved PR, OR click “Start Center” to return to your Start Center
- The I Want Doc will be displayed in the Procurement Gateway 25‐50 minutes later
- In your Procurement Gateway, review the I Want Doc for accuracy / completeness. If any of the MPO lines had a $0.00 unit cost, you must update them on the I Want Doc
- Add any attachments that are needed
- Submit the I Want Doc
- If a KFS PO is created from the I Want Doc, within 15 minutes of the KFS PO showing up in the KFS database, the MPO will automatically update to APPR status, along with any PO line updates
- If a KFS PO is not created from the I Want Doc, the MPO will not automatically update any PO lines or change to APPR status. If necessary, the MPO lines must be updated manually as well as the status changed to APPR manually.
- If line cost differences are known, ideally, they should be updated on the MPO before approving the MPO. Also, if the
exact amount of shipping is known, it should be entered on the MPO before it is approved. See Task 9b in this SOP for how to update costs. (Once the MPO is approved, a revision must be created in order to update the PO, then the MPO must be approved again.) - Click the “Approve” button
- Enter a Memo if desired, then click “OK”
- Note: Items cannot be received against the MPO unless the MPO is in APPR status
- If line cost differences are known, ideally, they should be updated on the MPO before approving the MPO. Also, if the
The Result Will Be: A Maximo PO will have been created from a Maximo PR. Information on the MPO will have been populated and/or verified, such as the type of purchase, the PO lines, cost information, and the ship to/bill to information. The order will have been placed with a vendor via eShop, a PCard, or an I Want Doc. For eShop or I Want Doc orders that become a KFS PO, the MPO will initially be in WAPPR status, and then will update to APPR status automatically once the KFS PO information downloads back into Maximo (within 30 minutes). For PCard orders or I Want Doc orders that do not become a KFS PO, the MPO lines must be updated manually as well as the status changed to APPR manually.